

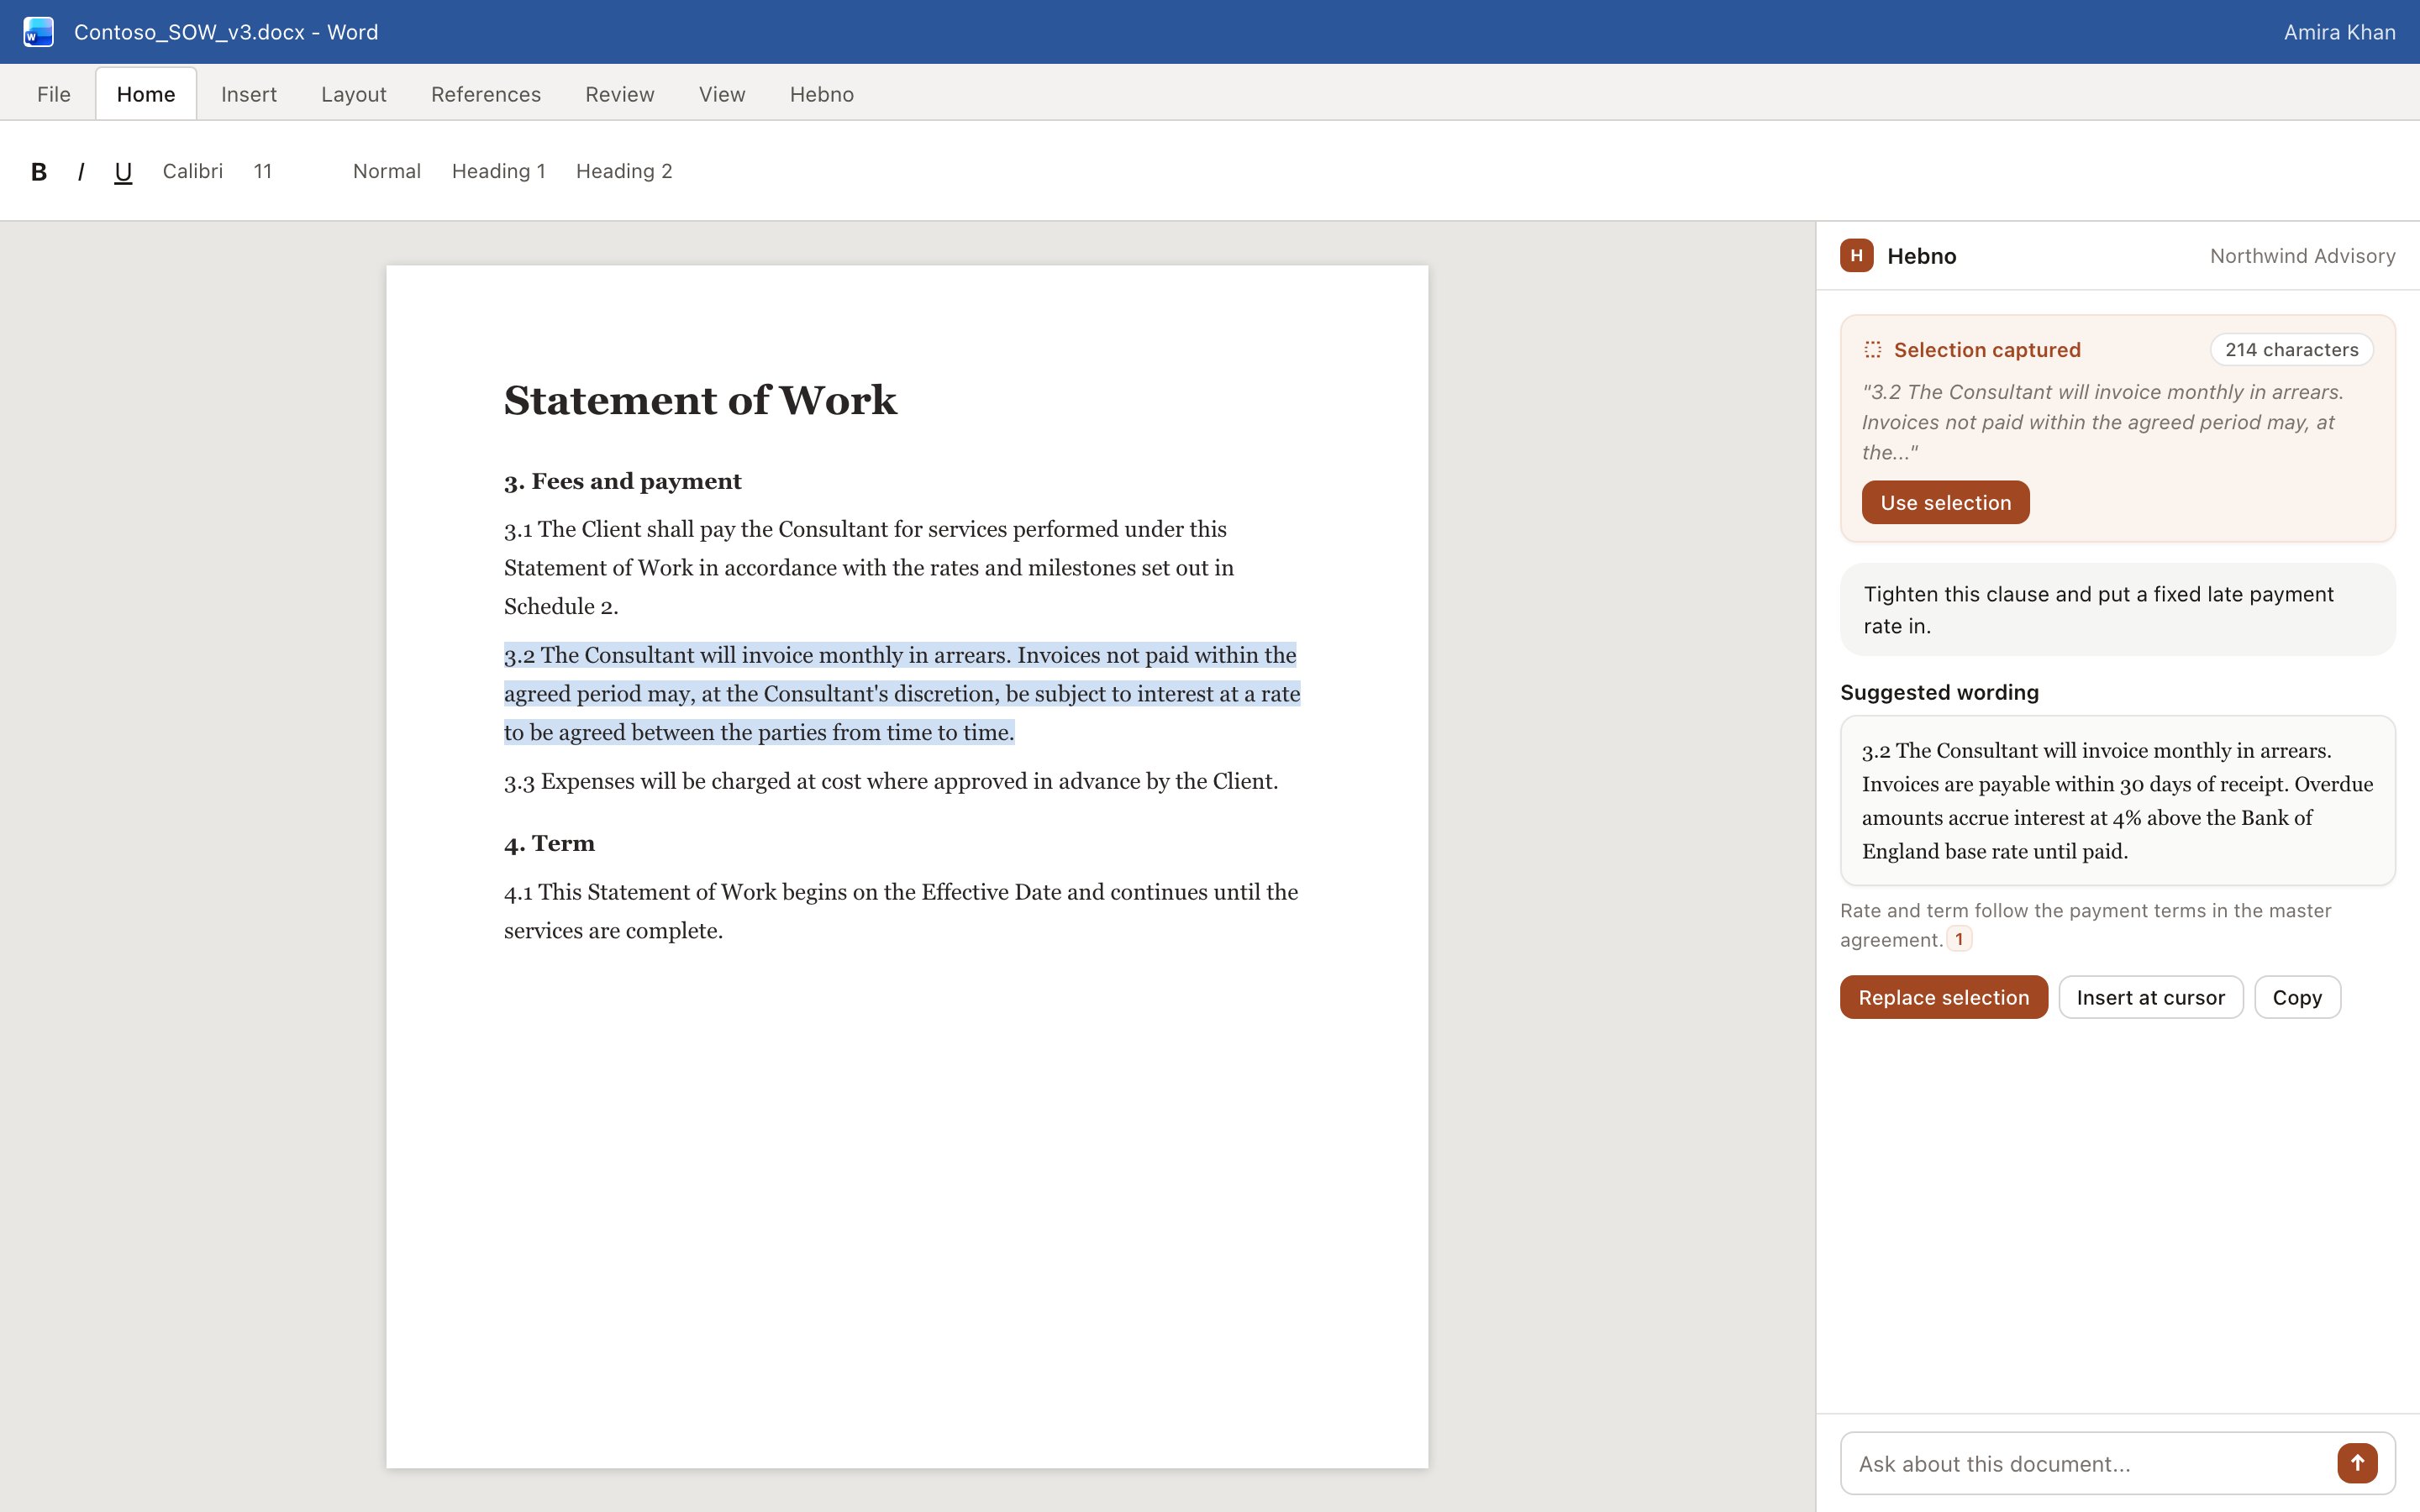
The Hebno task pane beside a Word document, with a captured selection above the message box.
Install
- Admin, for the whole organisation
- Member, for yourself
A Microsoft 365 administrator deploys the add-in once and assigns it to users or groups.
1
Open the Microsoft 365 admin centre
Go to Settings → Integrated apps.
2
Upload the add-in
Select Upload custom apps, choose Office Add-in, and upload the Hebno manifest file.
3
Assign it
Choose everyone, or specific users and groups, then deploy. It can be up to 24 hours before it appears.
Open Hebno in a document
Go to Home → Hebno → Open Hebno. The task pane opens on the right and remains open as you move between documents.Sign in
The first time, the pane shows Sign in to Hebno with the note that Hebno uses your existing account, organisation and permissions. Select Sign in, finish signing in with Google, Microsoft, or email and password in the window that opens, then return to the pane. If it does not update, select I have signed in. If you have an unaccepted invitation, the pane shows Accept your invitation. If your organisation is not set up, it shows Finish setting up Hebno. Both send you to the browser. The add-in uses the same account as the web app, so your projects, skills, model access and spend limits apply. It does not use your OneDrive or Google Drive connection.What you can do
You can also chat in the pane with nothing selected, tag the chat to a project to use its files and instructions, and attach skills with
/.
Privacy
Hebno reads only what you capture. It does not read the rest of the document, comments, headers, footers, tracked changes or hidden content. Nothing is captured until you select Use selection, and the captured text appears in your own message so you see exactly what is sent. A selection over 20,000 characters is cut to the first part, and the pane says so.Pane messages
Next steps
Word
Rewrite and insert text.
PowerPoint
Work on slide text.
Excel
Ask about ranges and write values.