

At a glance
Before you start
You need:- An owner or admin role in Hebno.
- A QuickBooks Online user who can authorise apps for the company, typically a Company admin.
Permissions
Each connection applies to one QuickBooks company. To connect a second company, add another connection from the QuickBooks card.
Connect QuickBooks
1
Allow the integration
Open Admin → Connectors → Catalogue, find QuickBooks under Finance, and set it to Allow.
2
Connect the company
Select Connect and sign in to QuickBooks. Choose the company and approve the request. Hebno shows the company name when the connection succeeds.
3
Choose teams and data areas
Under Who can use it, choose All teams or pick teams. Under Data areas, choose what members can see. See Data areas.
4
Set access
Access is Read only by default. Choose Read and write to let members propose time, draft invoices and estimates.
Link your own account
Members can link their own QuickBooks sign-in so writes are made in their name under their own QuickBooks permissions.- In Hebno, open Settings → Connections, find QuickBooks and select Link your account.
- Sign in to QuickBooks and approve the request for the company.
Data areas
Data areas control what members of the allowed teams can see through the organisation connection. They apply on top of what the connecting user can read in QuickBooks.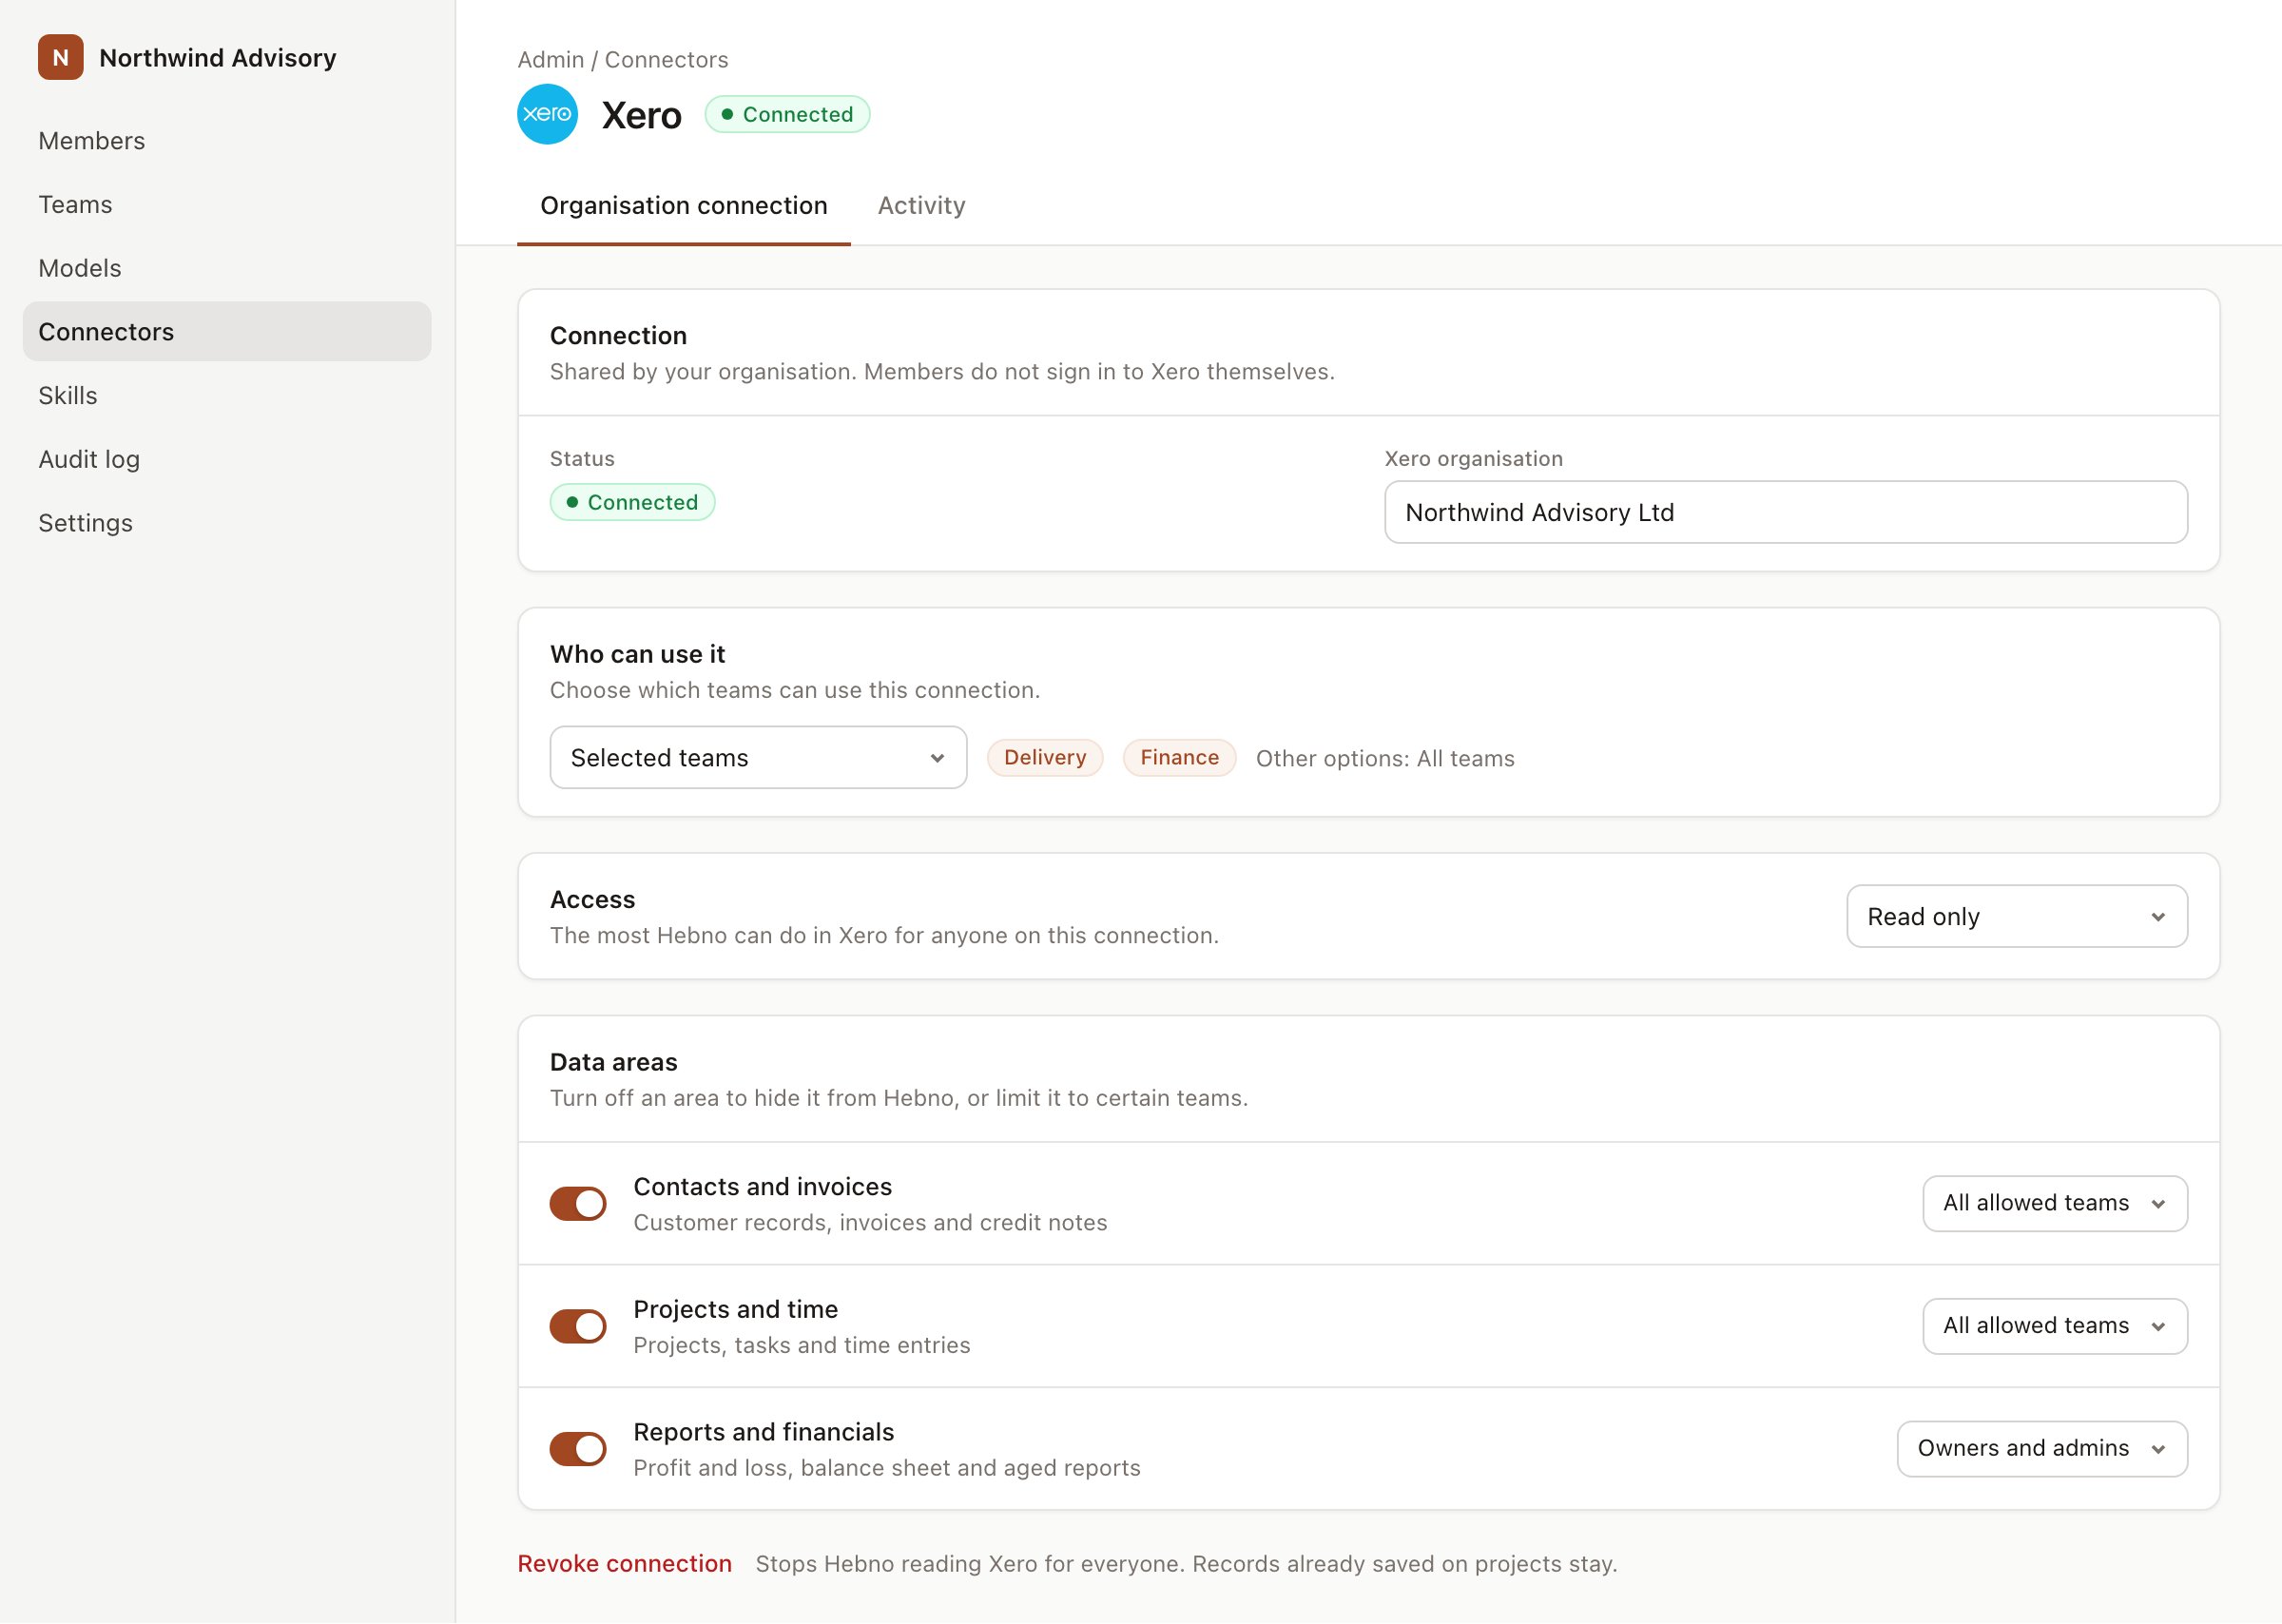
An organisation connection with team access and data areas. Financial figures default to owners and admins.
When a member has linked their own account, Hebno uses that member’s QuickBooks permissions instead of the organisation connection. Data areas still apply, so a member never sees more through Hebno than both QuickBooks and your Hebno settings allow.
What Hebno reads
Reports come from QuickBooks as they are at the time of the request, so figures match what the finance team sees. Reads are live. Hebno queries QuickBooks when a request needs it. Only what a reply used is stored with the conversation as its sources.
What Hebno writes
Every write appears first as a confirmation card. You can change any field before you select Confirm.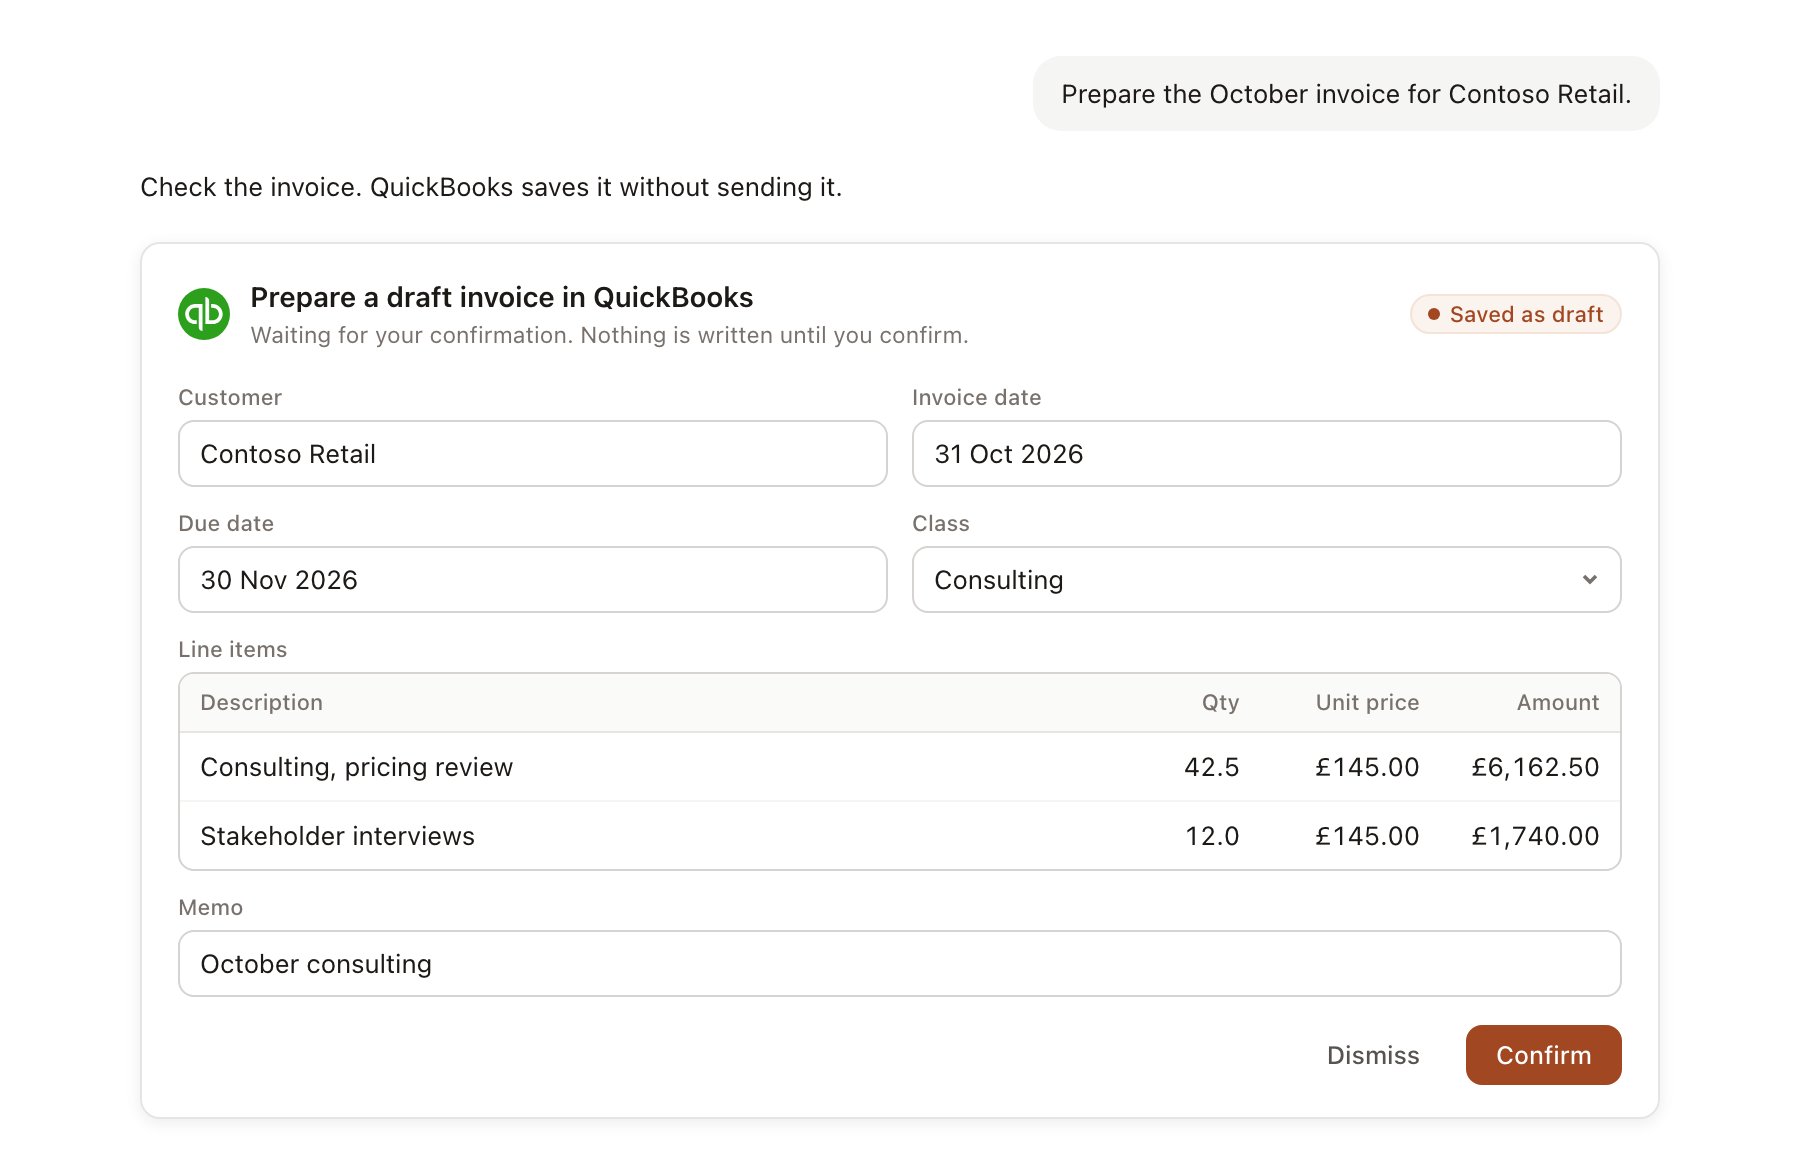
A QuickBooks change pending confirmation. Nothing is written until you confirm.
Link a project to QuickBooks
Linking marks which QuickBooks records belong to a project, so you can ask “what is unbilled?” without naming the customer.- Open the project and select Brain.
- Under Linked records, select Link record, then QuickBooks.
- Search and select a customer, a project under that customer, or a class. Link each record the engagement uses.
Use QuickBooks in chat
-
Attach: open the + menu, choose Sources → QuickBooks, and pick a customer, a project, an invoice or a report. Or type
/and choose QuickBooks. -
Ask: name the client, period or report in your request. For example:
Which Contoso invoices are more than 30 days overdue, and what do they total?
Show income and costs by customer for the quarter and flag any engagement under 30 percent margin.
Prepare an estimate for Contoso for a six-week operating model review.
- Research runs show a Checking QuickBooks step, with a chip for each record or report it read.
- Agents can read QuickBooks on a schedule, for example a Monday summary of overdue invoices. Writes an agent proposes appear in agent approvals for review.